Key Highlights
- A Python virtual environment gives a project its own Python interpreter environment and installed dependencies.
- Python's built-in venv module is the standard way to create a virtual environment without installing a third-party tool.
- Activating a virtual environment changes which Python and package-management commands your shell resolves to.
- Virtual environments reduce dependency conflicts between projects, but they do not completely isolate the operating system or Python process.
- Reproducible setups require more than a virtual environment: record dependencies, such as with a requirements.txt, and recreate the environment when needed.
Why Does One Python Project Work While Another Suddenly Breaks?
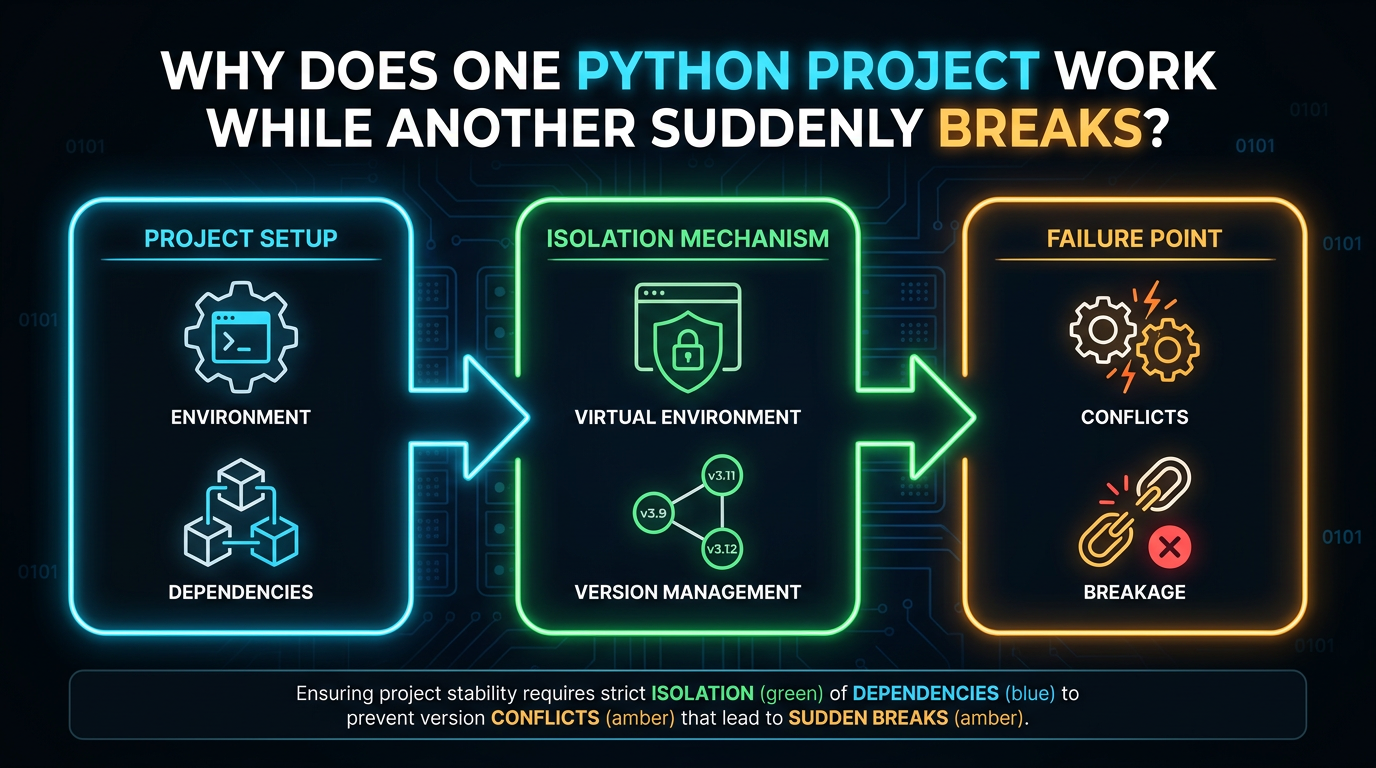
Imagine two projects on the same computer:
Project A → Django 4.x
Project B → Django 5.x
Python is used by both. Third-party programs are required for both. However, they have distinct criteria for dependencies.
Install everything worldwide, and updates for one project may unintentionally impact another. That is exactly the problem a virtual environment is designed to address.
If you have searched for what is a virtual environment in Python, wondered why developers use venv, or needed to know how to create a virtual environment in Python, the important idea is not just the activation command.
You need to understand what is being isolated, what is not, how packages get installed, and how another developer can reproduce the same setup.
In this blog, we will build a virtual environment from scratch, activate it on different operating systems, install dependencies, verify which Python is being used, and turn the setup into something another machine can reproduce.
What Is a Virtual Environment in Python?
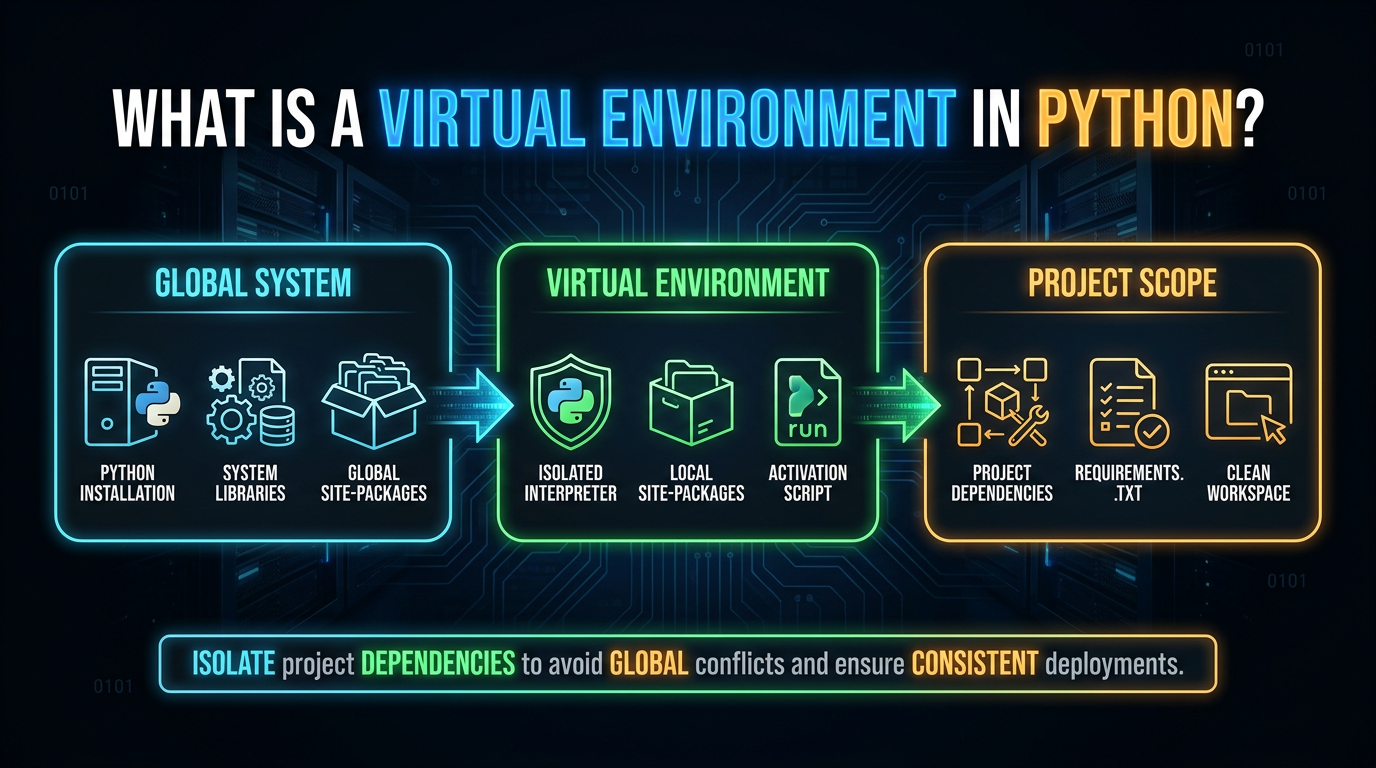
A Python virtual environment is an environment containing its own Python interpreter and an associated location for installed packages.
It allows different projects to maintain separate dependency sets.
For example:
Project A
└── .venv
           ├── Python
           └── packages

Project B
└── .venv
          ├── Python
          └── packages
You could have:
Project A → requests 2.x
Project B → requests 3.x
without requiring both projects to use the same installed package set. This is the core idea behind Python virtual environments. However, "isolated" does not mean completely separated from your computer. A virtual environment still uses the operating system, filesystem, network, and underlying machine resources. It is primarily a way to separate Python environments and their installed dependencies.
Why Use a Python Virtual Environment?
Without an isolated environment, you might install packages into a shared Python installation:
pip install requestsLater, another project might require a different version.
The dependency problem becomes:
Project A
    ↓
requires package version X

Project B
    ↓
requires package version Y
A virtual environment gives each project its own package installation location.
That makes the project easier to:
- develop
- test
- upgrade
- reproduce
- troubleshoot
It also makes it much clearer which dependencies belong to a particular project.
venv vs virtualenv
You will often see both Python venv and Python virtualenv mentioned.
They are related, but they are not the same tool.
venv
venv is part of Python's standard library:
python -m venv .venvFor many projects, this is all you need.
virtualenv
virtualenv is a separate third-party tool that provides functionality for creating virtual environments and has its own features and compatibility history. For a straightforward modern Python project, using the built-in venv module is usually the simplest starting point.
So when someone says:
"Create a virtualenv"
they may be referring generically to creating a virtual environment rather than specifically asking you to install the virtualenv package.
How to Create a Virtual Environment in Python
First, create or enter your project directory:
mkdir my_project
cd my_project
Then run:
python -m venv .venvThis is the basic command to create a virtual environment in Python.
The important part is:
python -m venvYou're asking the selected Python interpreter to run its venv module. .venv is simply the directory where the environment will be created. You could choose another name, but .venv is a common convention.
Your project might now look like:
my_project/
└── .venv/
You normally do not put your application source code inside .venv.
For example:
my_project/
├── .venv/
├── app.py
└── requirements.txt
Why Use python -m venv Instead of Just venv?
This command:
python -m venv .venvhas an important advantage: you explicitly invoke the venv module using the Python interpreter you selected.
You can verify which Python you're using first:
python --versionOn systems where python does not point to the desired interpreter, you may instead use:
python3 --versionand:
python3 -m venv .venvThis matters when multiple Python versions are installed. The virtual environment is created from the Python interpreter used to execute the command.
How to Activate a Virtual Environment
Creating an environment does not automatically activate it. Activation is a shell convenience that adjusts environment variables, most importantly PATH, so commands such as python and pip resolve to the environment's executables.
Windows Command Prompt
To activate venv in Windows Command Prompt:
.venv\Scripts\activateYou should then see something similar to:
(.venv) C:\Projects\my_project>The (.venv) prefix is a useful visual indication that the environment is active.
Windows PowerShell
Use:
.venv\Scripts\Activate.ps1PowerShell execution-policy settings can affect whether scripts are allowed to run.
Linux and macOS
Use:
source .venv/bin/activateThis is the common command to activate virtual environment Python on Unix-like systems.
After activation:
python --versionand:
pip --versionshould point to the environment's installation paths.
How to Verify That the Environment Is Active
Do not rely only on seeing (.venv) in your terminal. Check the interpreter itself.
On Linux or macOS:
which pythonOn Windows Command Prompt:
where pythonYou should see a path associated with your .venv directory near the top.
You can also run:
python -c "import sys; print(sys.executable)"This is particularly useful when troubleshooting.
For example, you might see:
C:\Projects\my_project\.venv\Scripts\python.exeThat tells you exactly which interpreter is running.
What Does Activation Actually Do?
This is one place where virtual environments are often oversimplified. Activating .venv does not magically move your entire computer into an isolated Python world. Instead, the activation script modifies your shell environment so that commands resolve to the environment's executables.
Conceptually:
Before activation

python
  ↓
system Python

After activation

python
  ↓
.venv Python
The exact implementation varies by platform and shell, but the practical effect is that:
python
pip
resolves to the environment's tools. You can also use a virtual environment without activating it at all by invoking its Python executable directly.
For example, on Linux/macOS:
.venv/bin/python app.pyOn Windows:
.venv\Scripts\python.exe app.pySo activation is convenient, not the fundamental mechanism that makes the environment exist.
Installing Packages Inside the Environment
Once activated, install a dependency:
python -m pip install requestsUsing:
python -m pipis useful because it makes the relationship between the Python interpreter and pip explicit.
You can then verify:
python -m pip show requestsor:
python -m pip listThe package is installed into the environment rather than the normal global package location. This is where Python packages become important: each project can maintain the package versions it actually needs instead of relying on one shared collection of dependencies.
Why python -m pip Is Useful
You may see:
pip install requestsand:
python -m pip install requestsBoth can work. But when troubleshooting multiple Python installations, the second form is often clearer:
python -m pipmeans:
Run the pip module using this particular python interpreter.
That helps avoid situations where:
python → one Python installation
pip    → another Python installation
Checking both can save considerable debugging time:
python -c "import sys; print(sys.executable)"
python -m pip --version
Creating a Reproducible Environment
A virtual environment solves one problem:
Where should this project's Python dependencies live?
It does not automatically solve another:
Which exact dependencies should another developer install?
For that, record your dependencies.
A common approach is:
python -m pip freeze > requirements.txtThis produces a file containing installed package requirements. Another developer can create a fresh environment and install them with:
python -m pip install -r requirements.txtThe workflow becomes:
Create environment
       ↓
Activate environment
       ↓
Install dependencies
       ↓
Record dependencies
       ↓
Share project
       ↓
Create fresh environment
       ↓
Install dependencies
This is the foundation of a reproducible Python setup.
Does requirements.txt Recreate Everything Exactly?
Not necessarily. This is an important distinction. A requirements file can record package versions, but reproducibility can depend on additional factors, including:
- Python version
- operating system
- CPU architecture
- platform-specific dependencies
- package availability
- build requirements
For instance, even if the package versions are the same, a project created using Python 3.12 could not function the same way with Python 3.9. So a stronger project setup records the Python version requirement as well as the dependencies.
A Practical Project Structure
A simple project could look like:
weather_app/
├── .venv/
├── app.py
├── requirements.txt
└── README.md
The .venv directory is normally not committed to version control.
Instead, commit:
app.py
requirements.txt
README.md
and document how to recreate the environment.
For example:
python -m venv .venvthen activate it and run:
python -m pip install -r requirements.txtThis is much more portable than sharing the environment directory itself.
Why You Usually Shouldn't Commit .venv
A virtual environment contains machine-specific files and installed packages.
For example:
.venv/
├── Scripts/
├── Lib/
└── ...
Its contents depend on the machine, operating system, Python installation, and installed dependencies. Instead of committing .venv, add it to .gitignore:
.venv/Then version-control the files required to recreate it.
The principle is:
Commit the recipe, not the environment.
How to Deactivate a Virtual Environment
When you're finished:
deactivateThis returns your shell to its previous environment. There is no need to delete the virtual environment every time you finish working. You can later return to the project and activate it again. If you need to remove the environment completely, simply delete the .venv directory after deactivating it.
Creating a Fresh Environment
Sometimes the environment itself becomes messy or corrupted. Instead of manually trying to repair every installed package, rebuilding it can be simpler.
For example:
deactivateRemove .venv, then recreate it:
python -m venv .venvActivate it and reinstall:
python -m pip install -r requirements.txtThe result is a fresh environment based on the project's dependency specification. This is one of the biggest practical advantages of treating environments as disposable.
What a Virtual Environment Does Not Isolate
A virtual environment is not a virtual machine.
It does not provide complete system isolation.
Your program can still access resources permitted by the operating system, including:
- files
- network connections
- environment variables
- system resources
The main isolation is around the Python interpreter environment and installed Python dependencies.
So this:
virtual environmentshould not be confused with:
container
virtual machine
operating-system sandbox
They solve different problems.
Common Virtual Environment Mistakes
1. Installing Packages Before Activation
You run:
pip install requestsbut later:
python app.pycannot import requests.
The first thing to check is whether pip and python refer to the same environment.
Run:
python -c "import sys; print(sys.executable)"
python -m pip --version
2. Assuming (.venv) Guarantees Everything Is Correct
While the prompt signal is useful, verification is preferable.
Utilize:
Python -c "import sys; print(sys.executable)"Examine your shell setup if the path does not lead to the desired environment.
3. Creating Multiple Environments Accidentally
You might have:
project/
├── .venv/
├── venv/
└── env/
All three could represent different environments. Pick one project convention, .venv is common, and use it consistently.
4. Committing .venv to Git
Don't normally commit the entire environment.
Use:
.venv/and commit your dependency specification instead.
5. Assuming a Virtual Environment Solves Every Dependency Problem
It separates environments, but it does not guarantee compatible dependencies.
This can still fail:
Package A requires X < 2
Package B requires X >= 3
The environment prevents those requirements from interfering with another project's environment, but it cannot make incompatible requirements compatible.
venv and IDEs
Modern editors such as VS Code can detect virtual environments in your project.
A typical project might contain:
project/
└── .venv/
After creating it:
python -m venv .venvyou can select the .venv interpreter through the editor's Python interpreter selection.
Instead of thinking that activation altered everything within the IDE, verify the chosen interpreter if your editor executes code with an incorrect Python installation. This distinction is important because, although they can be configured separately, an editor's chosen interpreter and a terminal's activated environment are connected.
A Complete Setup From Scratch
Here's the whole process in one place.
1. Create the project
mkdir demo_project
cd demo_project
2. Create the environment
python -m venv .venv3. Activate it
Linux/macOS:
source .venv/bin/activateWindows Command Prompt:
.venv\Scripts\activateWindows PowerShell:
.venv\Scripts\Activate.ps14. Verify Python
python -c "import sys; print(sys.executable)"5. Install a package
python -m pip install requests6. Save dependencies
python -m pip freeze > requirements.txt7. Deactivate when finished
deactivateAnother developer can then create a fresh environment and run:
python -m venv .venvactivate it, and install:
python -m pip install -r requirements.txtThat's the basic create virtual environment Python workflow from beginning to end.
When Should You Create a New Virtual Environment?
A useful rule is:
Create one environment per project or independently managed application environment.
For example:
client-a/
└── .venv/

client-b/
└── .venv/

personal-project/
└── .venv/
This keeps dependency decisions local to each project. You don't necessarily need a new environment for every tiny Python script, but once a project has dependencies or needs a specific Python/package combination, isolation becomes valuable.
Final Takeaway
A Python virtual environment is not complicated once you separate the concepts.
venv creates the environment:
python -m venv .venvActivation makes the environment's Python tools convenient to use:
source .venv/bin/activateor the platform-specific activation command.
Packages installed through:
python -m pip install ...then belong to that environment's dependency set.
For reproducibility, record those dependencies:
python -m pip freeze > requirements.txtand recreate the environment when needed:
python -m venv .venv
python -m pip install -r requirements.txt
The most important mental model is this:
A virtual environment is a project-specific Python environment, not a complete computer sandbox.
Commands like activate venv, deactivate venv, python -m venv, and python -m pip cease to be discrete commands to learn once you grasp this distinction. They join together to form a single, cohesive process for securely and consistently handling Python dependencies.